Working with Programs
Learn to manage QSR Program banks using QS Edit Pro software. Change modes. Select, copy, and paste Programs. View parameter settings.
Before you begin
- Review the general concepts presented in this Manual.
- Determine your system configuration, download the software, and assemble your hardware.
- Launch QS Edit Pro.
- Verify MIDI communication between the QSR and QS Edit Pro.
- Transfer the Dump ALL Sysex file from the QSR to QS Edit Pro.
About this task
Note: New users should follow these steps to explore the features of the
QSR. Experienced users may skip this topic.
Links to topic sections
Procedure
Switching to Program Mode
-
Click .
Tip: You can also use the F5 key or the Switch to Program button
 to enter Program mode.
 -
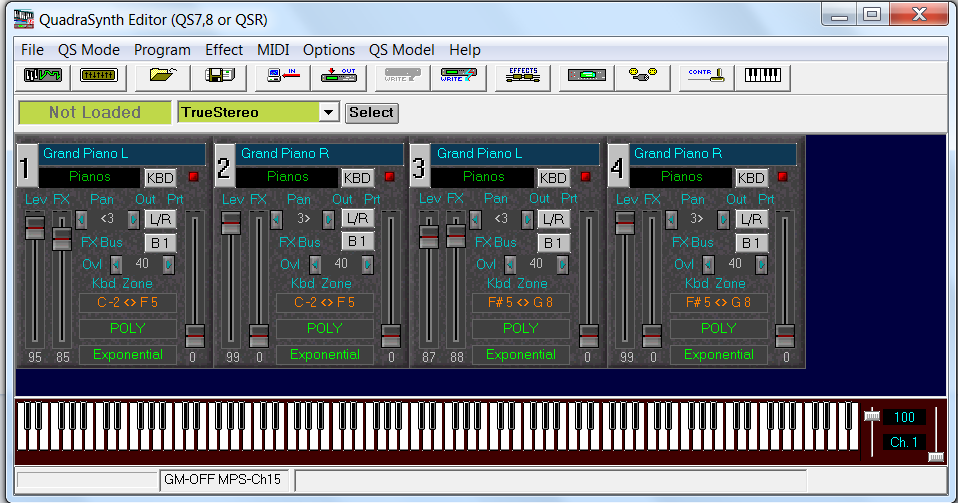
Verify that QS Edit Pro displays the 4 Program sound layers. You may see a
different Program name. Your system will show details for the current Program in
use.
Changing Programs
-
Click using the dropdown menus or click the
Select button to open the Program
Banks window.
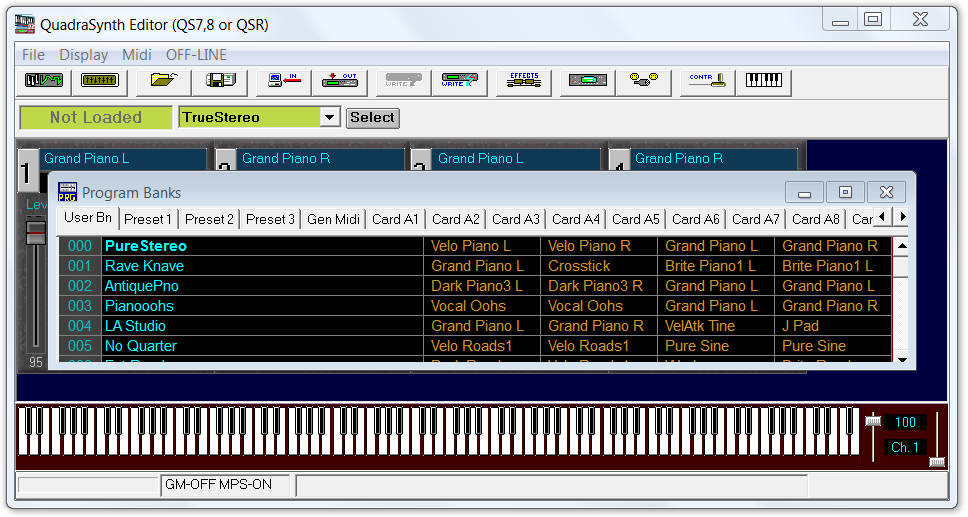
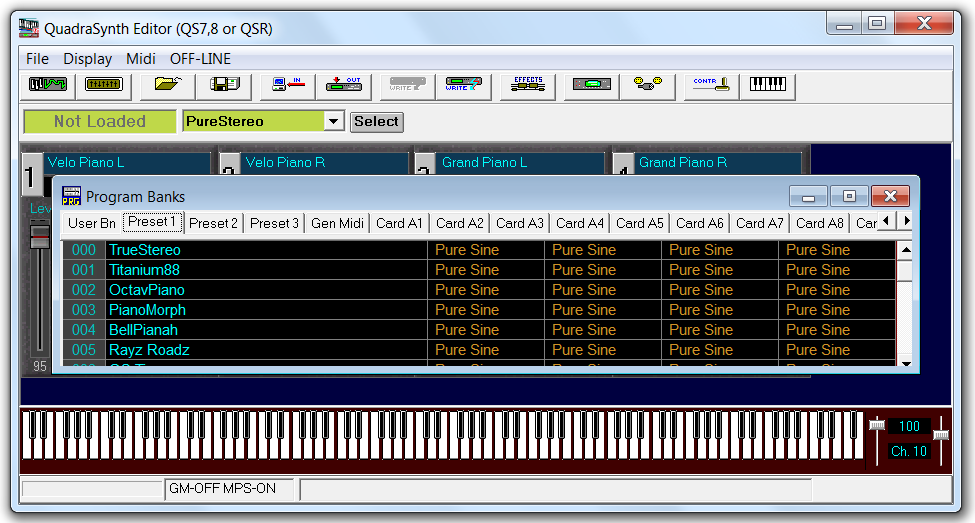
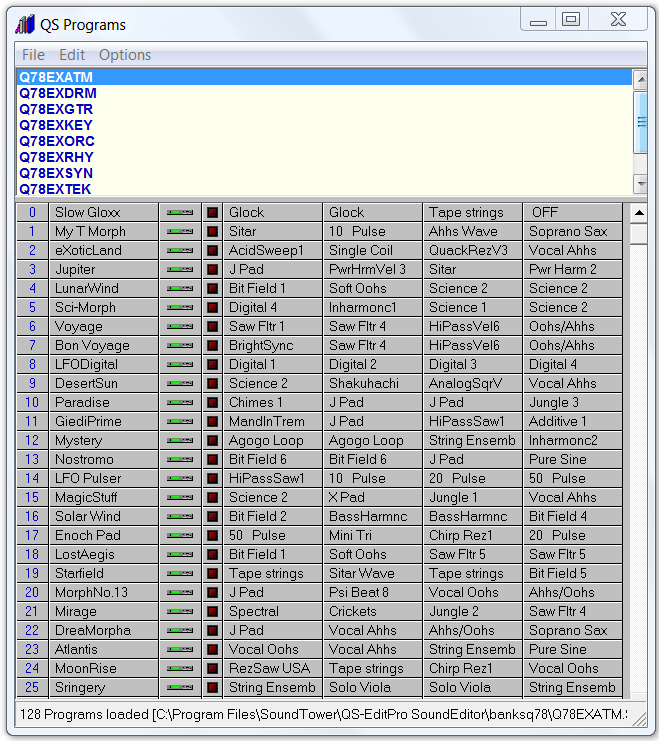
Note: QS Edit Pro opens the Program Banks window with the programs in the currently selected bank. User, Preset, General MIDI, and Card banks can be viewed by clicking on the tabs at the top of the window.Tip: A listing of the Programs included in the factory Preset, GM, and User banks can be downloaded using the link below.Tip: The factory User bank contents can be seen in the screen shot above. If your QSR User bank has been modified you will see different program names. If you want to restore the factory User bank contents download the QSR Factory User bank SYSEX zip file using the link below. -
Verify that the Program name shown in QS Edit Pro matches the Program name
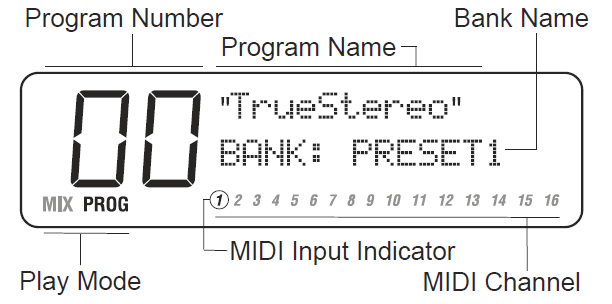
displayed on the QSR front panel. The layout of the QSR LCD display is shown
below. In this example, I selected the "PureStereo" program so the QSR display
shows"00/PureStereo"/BANK: User instead. If the
Program names match, close the Program Banks window.
Trouble: You may have to click away from the current program number and then reselect the Program name to get the QSR to respond and show the updated Program information.
Auditioning Program sounds
Viewing Program Sound Layer parameters (Keyboard mode)
-
Familiarize yourself with the QS Edit Pro Program Mode
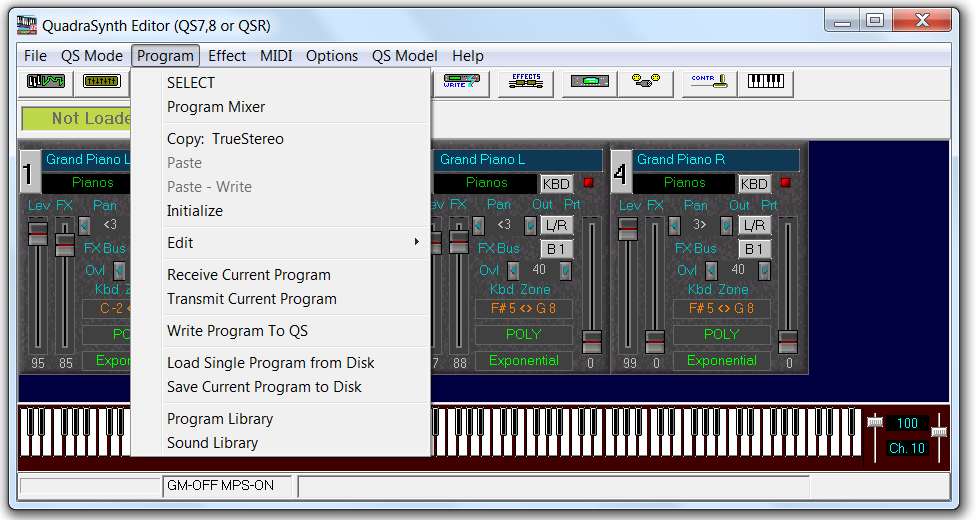
window. It shows the 4 sound layers for the Program you selected. The figure
below shows the sound layers for "PureStereo" (the first Program in the default
User bank).
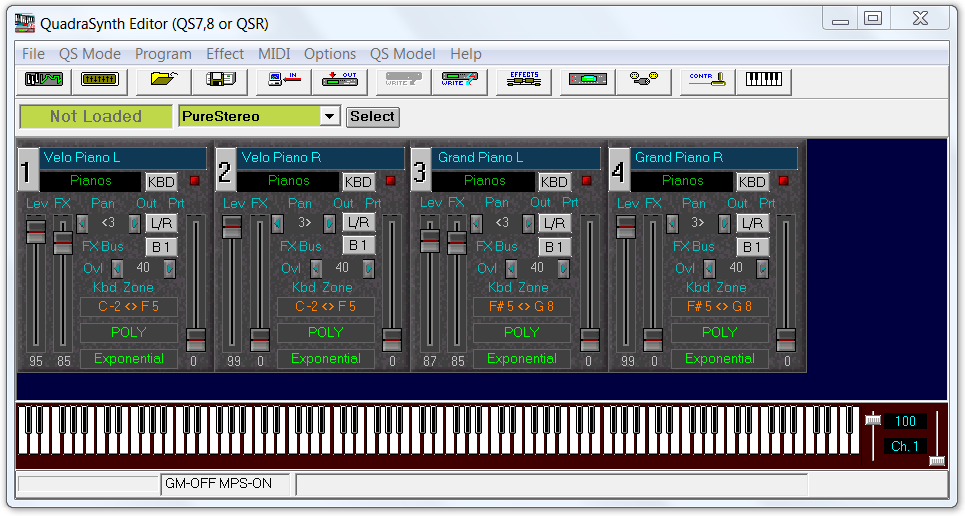
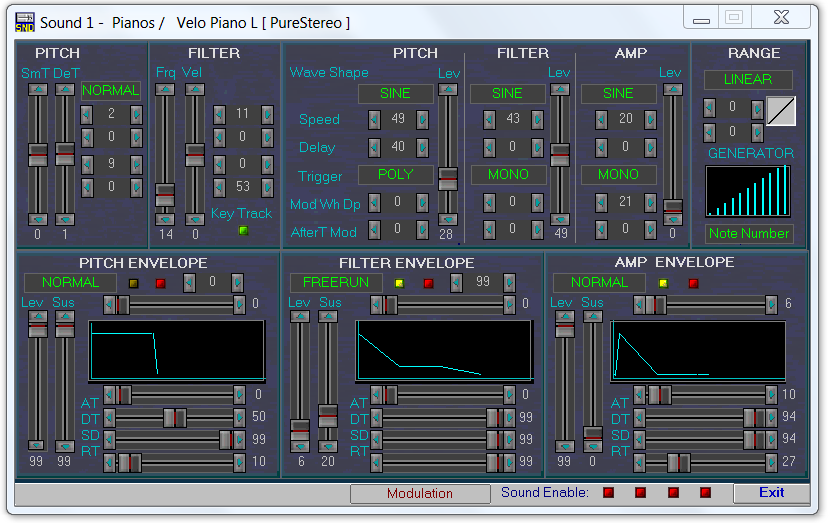
The "PureStereo" Program is a 4-layer keyboard program. The QS Edit Pro window shows that all 4 layers are set to Keyboard mode. Layers 1 and 2 are the left/right stereo channels for the "VeloPiano" sound. Layers 3 and 4 are the left/right stereo channels for the "GrandPiano" sound. Because the QSR only supports monophonic samples it is necessary to use 2 layers for stereo sounds.Refer to the QS Edit Pro tutorials and the QSR Reference Manual for more information on the controls available in Keyboard mode. -
Click the grey button labeled 1 to open the
Sound Editor window.
The functions available for editing sounds in Keyboard mode are designed for instrumental sounds that will be controlled using a keyboard or similar controller. These functions can be applied to drum kits but the parameter settings apply to all note numbers (drum sounds) simultaneously, which limits their usefulness.
Viewing Program Sound Layer parameters (Drum mode)
-
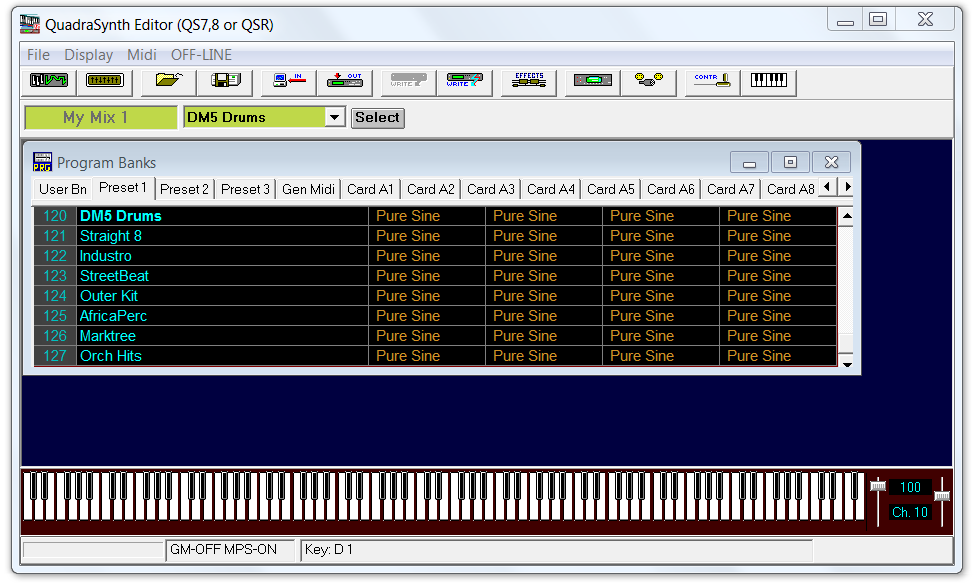
Navigate to the Preset 1 tab and scroll to Program
location 120. Select the "DM5 Drums" Program, then close the Program
Banks window.
-
Examine the Program Mode window below.
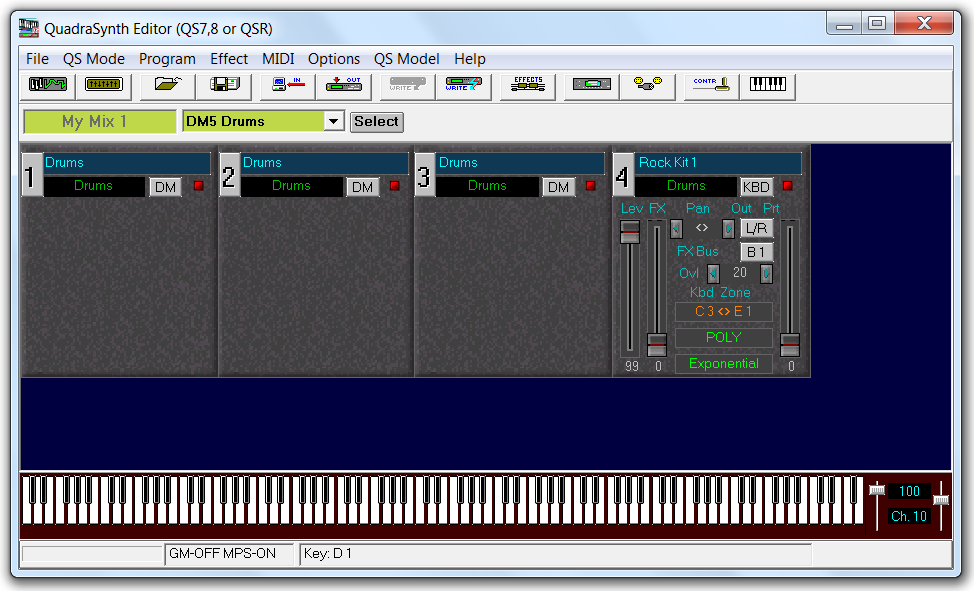
Note: The first three sound layers are set to Drum mode. Only the last layer is set to Keyboard mode. Layer 4 is restricted to notes C3 and above (percussion sounds) and also to notes E1 and below. You can test this by disabling layers 1-3 and playing notes on the Virtual Keyboard. -
Click the layer 1 button to open the Drum
Edit window.
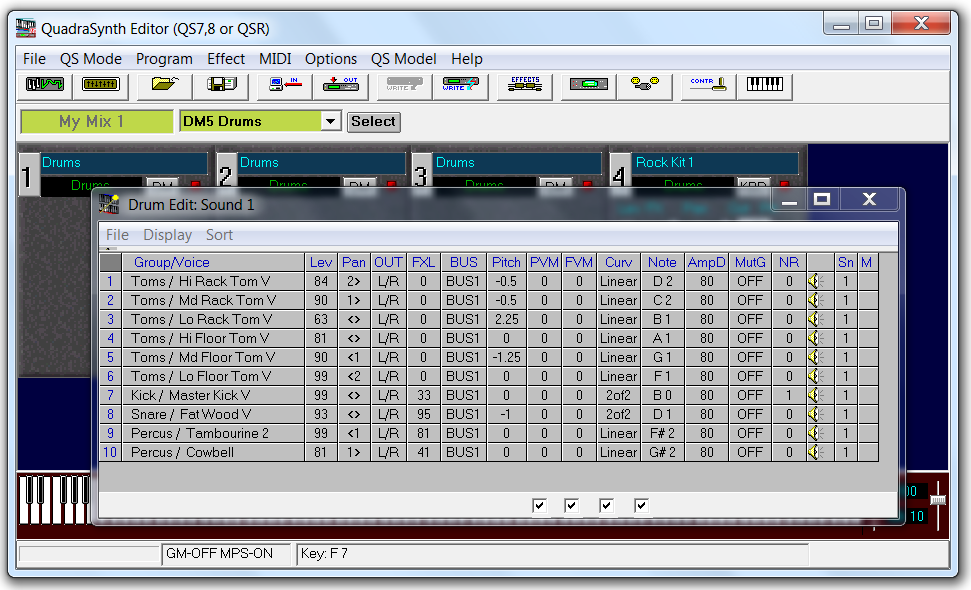
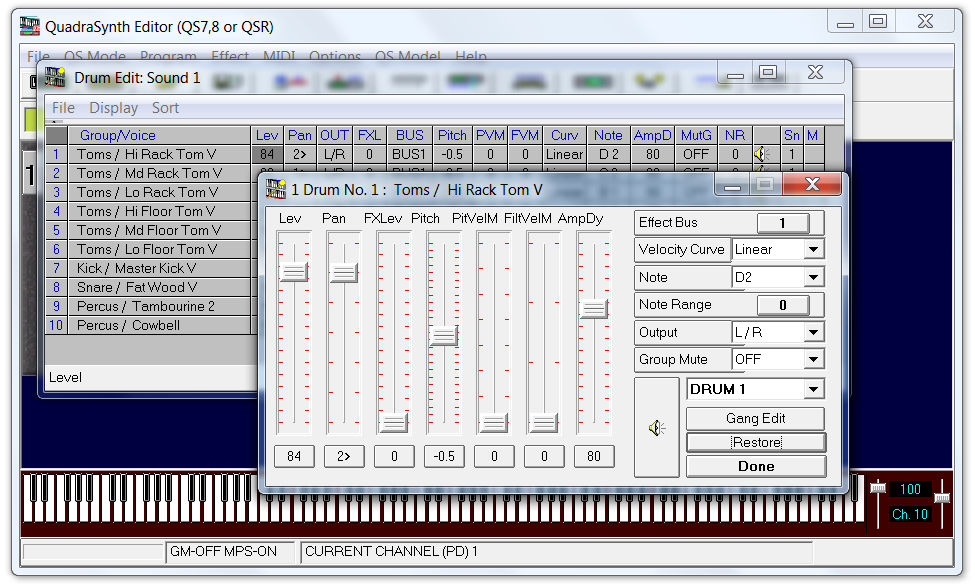
Note: The Drum Edit window opens showing the 10 drum sample slots for layer 1. Each sample slot entry shows the sample name (Group/Voice), volume level (Lev), pan (Pan), output bus (OUT), effects level (FXL), effects bus (BUS), pitch (Pitch), pitch velocity modulation (PVM), filter velocity modulation (FVM), velocity curve (Curv), note number (Note), amplitude decay (AmpD), mute group (MuG), note range (NR), and sound layer number (Sn). For more information on these controls, refer to the QSR User Manual and QS Edit Pro tutorials. -
Audition the sounds in each slot by clicking the
 (Note Play) button.
Attention: Auditioning sounds directly from the Drum Edit window requires a different MIDI channel setting than the setting used with the Virtual Keyboard. Before you can audition sounds from this window, you must set the MIDI channel on the QSR front panel LCD display to channel 1, regardless of the Virtual Keyboard MIDI Channel slider setting. The Drum Edit window Note Play button only works with the QSR set to MIDI channel 1.
(Note Play) button.
Attention: Auditioning sounds directly from the Drum Edit window requires a different MIDI channel setting than the setting used with the Virtual Keyboard. Before you can audition sounds from this window, you must set the MIDI channel on the QSR front panel LCD display to channel 1, regardless of the Virtual Keyboard MIDI Channel slider setting. The Drum Edit window Note Play button only works with the QSR set to MIDI channel 1. -
Double-click the Lev cell for drum sample slot 1 to open
the Drum Sound Editor window below.
This editor window provides controls for each of the drum sound parameters. Adjust the sliders or use the dropdown menus to experiment with the effect of each control.
Managing Programs
-
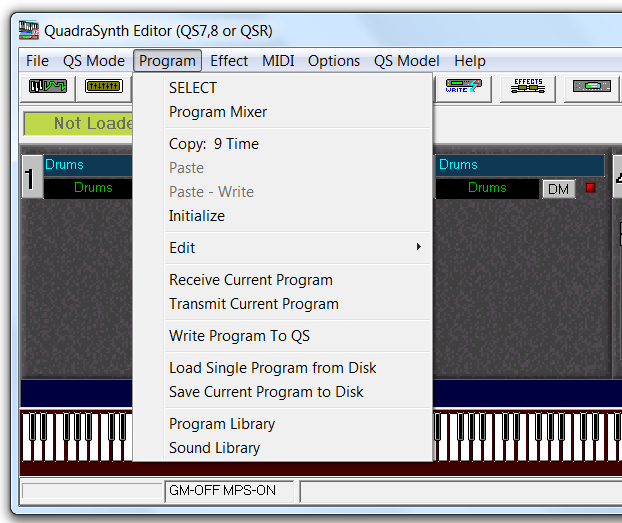
Open the Program dropdown menu to access options for
editing the program sounds, transferring programs between the QSR and your
computer, and saving programs to disk.
-
Click the Select button to open the Program
Banks window.
-
Click .
This copies the program settings to the clipboard so you can paste the program into a User bank Program slot.
Program Librarian
-
Click on to open the Program Librarian window shown
below.
You can use the Program Library window to manage QS Program bank files. However, Sound Tower does not provide documentation for the Program Librarian window. The behavior of this window causes confusion. For example, files can be added to the librarian but it appears removing them may not be possible.You can open the SYSEX files from QS-4 and QS-7/8 series synthesizers provided by Sound Tower, or open your own bank data.