Exploring the Alesis QS Drum Programs
Examine the Alesis factory drum Programs to see how they were constructed. Understanding the structure of the QSR's built-in drum and percussion Programs will help you create your own custom drum Programs.
Before you begin
- Review the Quadrasynth Drum and Percussion Programs concept topic.
- Print a copy of the General MIDI Drum Map for reference.
- Connect your computer's MIDI interface to the QSR and verify communication.
- Upload the provided QS Drum Programs Bank SYSEX file to the QSR User bank.
About this task
In this topic, you will explore the Alesis QS drum and percussion Programs in the QS Drum Programs Bank SYSEX file. You will learn techniques for using Drum mode and Keyboard mode sound layers in Programs. Becoming familiar with the use of sound layers and their parameters will prepare you for editing and creating drum Programs for the QSR.
Links to topic sections
Procedure
Accessing the QS Drum Programs
-
Click the User Bn tab in the Program
Select window. Stretch the window to view the list of Programs in
the User bank.
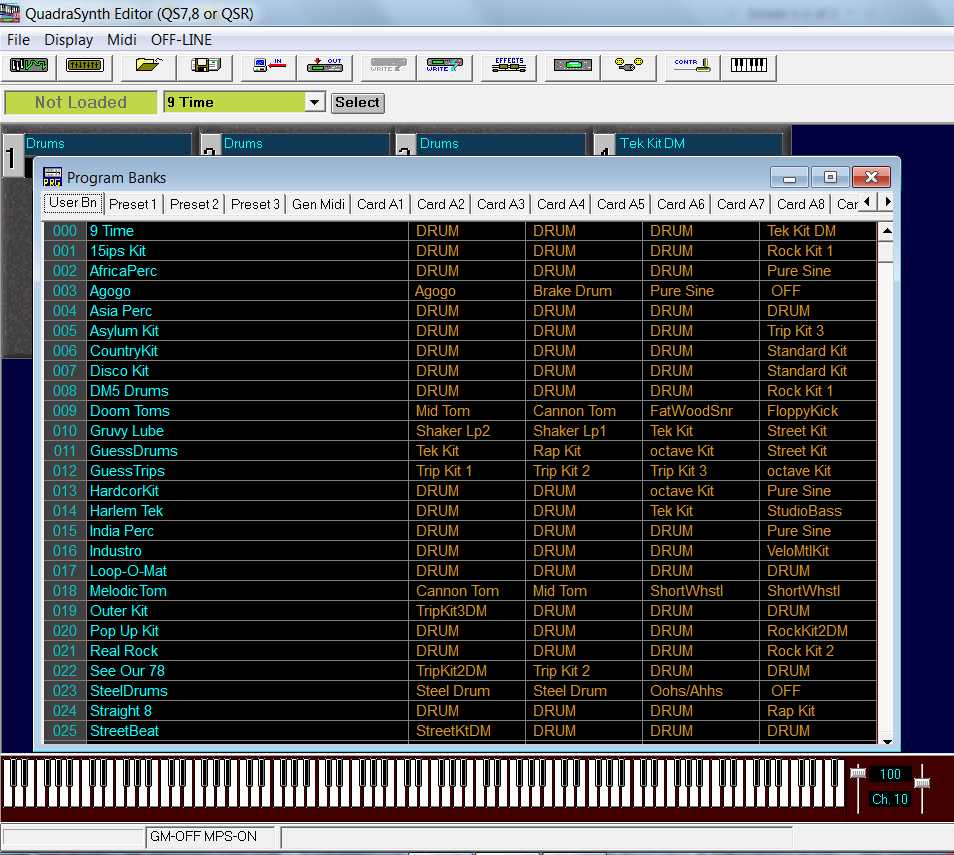
The Program Select window shows the QS Drum Programs in each Program slot. The four columns on the right show the contents of each sound layer in the Program.
Auditioning Program sounds
Viewing Program parameters
-
The Program Mode window in QS Edit Pro shows the four
sound layers below. Carefully review the parameter settings shown for the
selected "9 Time" drum program.
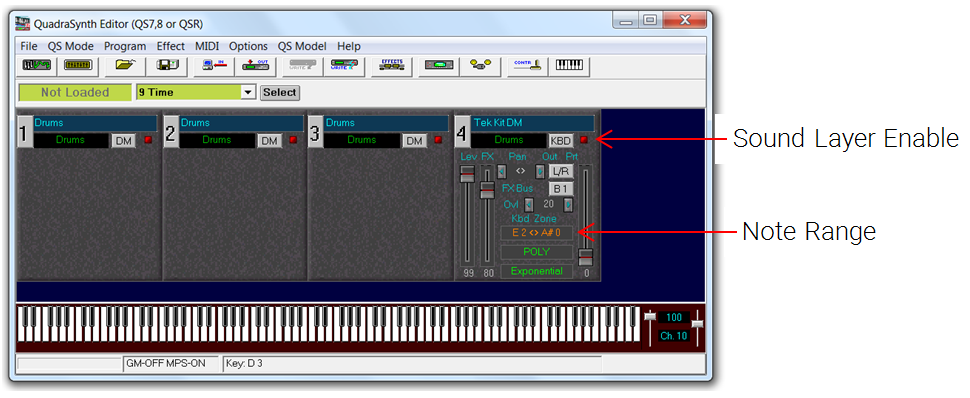
As you see, the "9 Time" Program has three sound layers set to Drum mode and one layer set to Keyboard mode. All four Sound Layer Enable buttons are ON. Layer 4 uses the predefined drum kit called "Tek Kit DM" but the Keyboard Zone parameter is set, limiting the Note Range for the layer to notes above E2. This limits the layer to cymbals and percussion sounds and excludes the kit's drum sounds.Many of the Alesis QS drum and percussion Programs use the technique shown here, where one sound layer is used in Keyboard mode with a built-in drum kit assigned. The purpose is to provide coverage for the entire range of General MIDI drum and percussion note numbers in a single Program. By doing this, a sequencer or keyboard can play any of the General MIDI drum sounds across the keyboard range using a single MIDI channel.The other sound layers are placed in Drum mode, allowing up to 30 drum sounds to be fine-tuned, with individual parameter settings, and enabling techniques such as sample layering and velocity crossfading. If all four layers were used in Drum mode, 40 drum sound slots would be available.We will learn to create Programs for use in Mix mode, where coverage of the entire note range in a single Program is not required. We can use a Program with a built-in Alesis drum kit on a Keyboard Mode layer on a separate MIDI channel in the Mix to allow access to the QSR's percussion sounds, for example, while using Drum mode for most other MIDI channels.
Drum kit parameters available in Keyboard mode layers
-
Carefully examine the parameter settings for Layer 4.
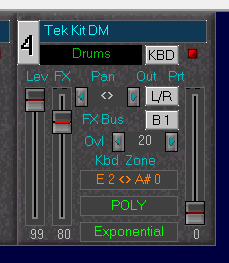
Because this layer is in Keyboard mode, you see available controls for parameters that are frequently accessed. Note that these controls affect the drum kit as a whole, not individual drum sounds. Any adjustments made here affect all the drum and percussion sounds on this layer. For example, if you change the Pan setting it will change the panning of all the instrument sounds in the kit. Refer to the QSR Reference Manual and the QS Edit Pro tutorials for more details on these parameters.For now, review the following settings:- The Level control is set to 99 (maximum).
- Effects Level is set to 80.
- Pan is set to center.
- Outputs are routed to the main L/R channels.
Drum kit parameters available in Drum mode layers
-
Click the grey 1 button to open Drum
Edit window.
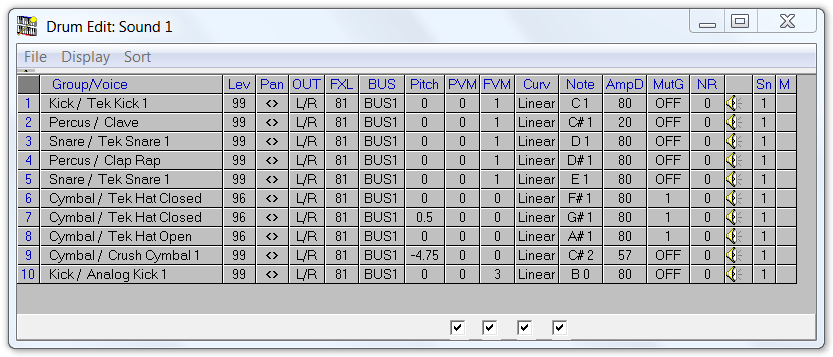
The window opens showing a table containing the 10 sound slots in Layer 1. The rows are in slot number order. Columns contain parameter settings for each individual slot. Parameters can be separately adjusted.Refer to the QS Edit Pro tutorials and the QSR Reference Manual for details on the parameters and their settings. -
Before making changes to any of the settings, click .

-
Stretch the Drum Edit window vertically until all 30 rows
are visible.
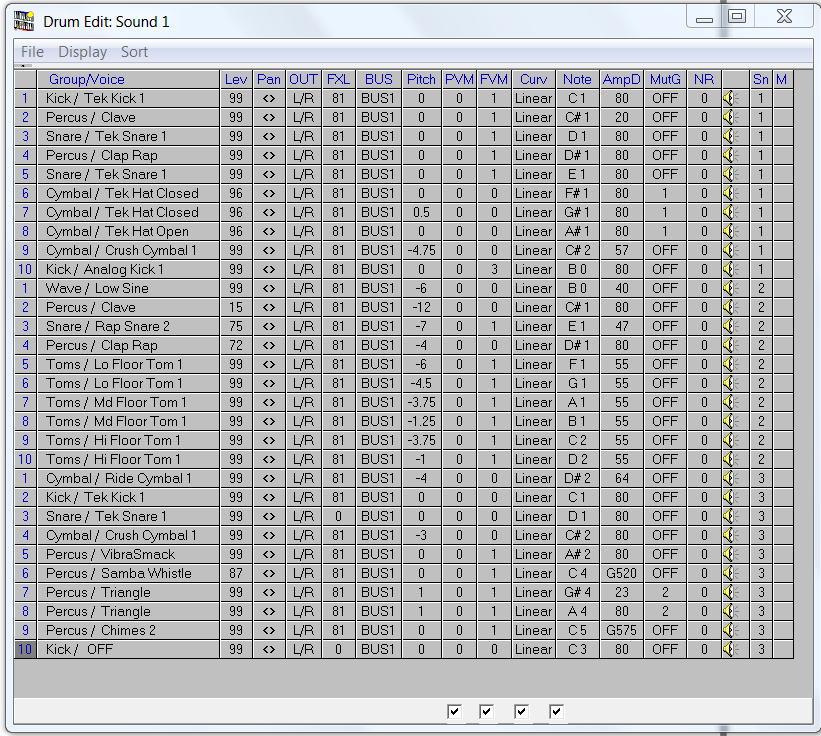
The Drum Edit window now shows the slots in each of the three sound layers set to Drum mode. The rows are ordered by layer number, then by slot number. We will re-sort the table to make it easier to visualize the organization of samples in the Program. -
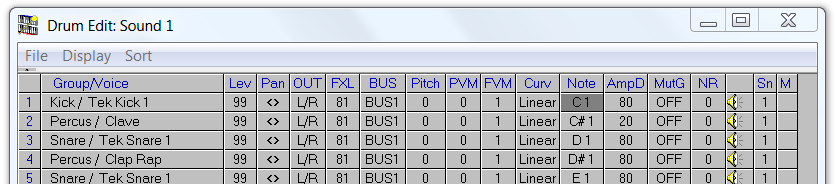
Click the cell in the first row and in the Note column.
The cell should indicate note C1 and be highlighted as
shown.
-
With the note cell selected, click Sort in the top menu
bar. This will re-order the rows in note number order.
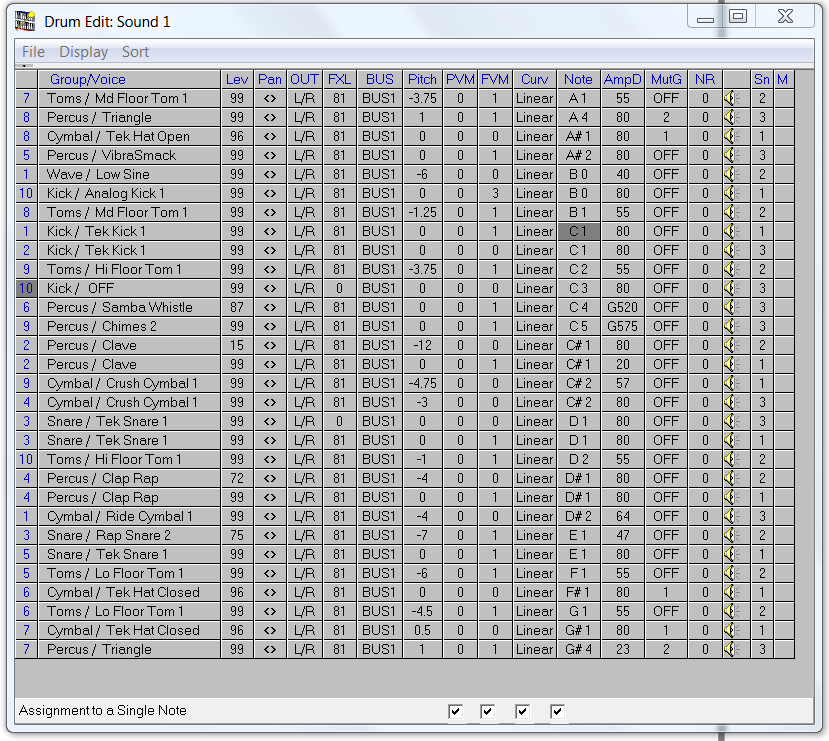
With the Drum Edit table sorted by note number you can easily locate sounds for specific drums. You can also see when multiple sounds have been assigned to a single note.You can play sounds assigned to any note directly from this window. Click the (Note Play) button. Trouble: The MIDI channel on the QSR front panel LCD display must be temporarily set to 1 for this button to work.
 -
Double-click on a sound slot cell to edit a sound parameter. Some cells allow
direct editing (the Pan setting, for example). Double-clicking on other cells
opens the Parameter Adjustment window. The
Parameter Adjustment window provides access to multiple
sound slot settings.
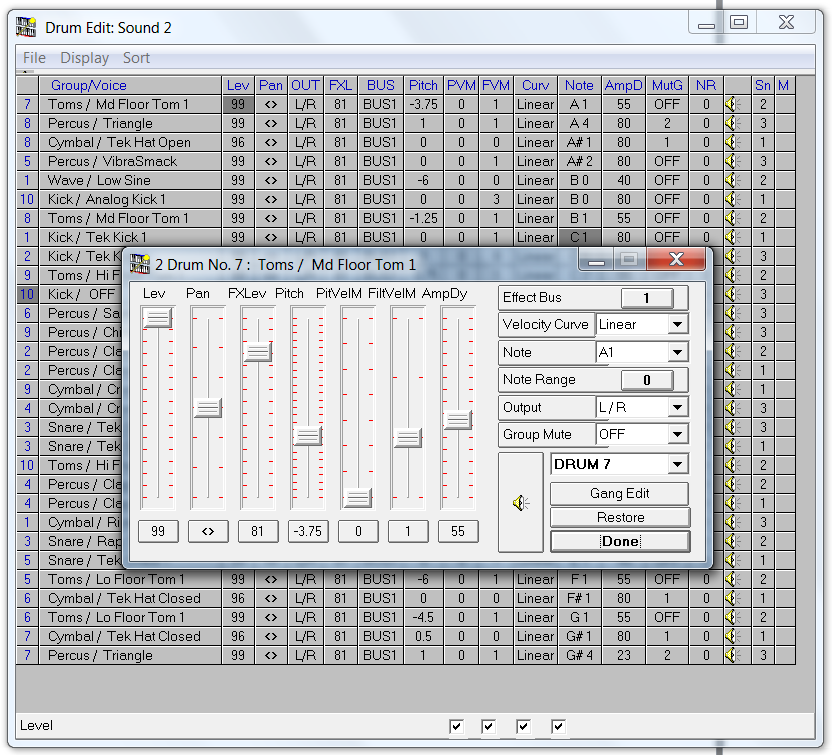
Use the Parameter Adjustment window to edit Drum mode sound slots within a QSR Program.