Organizing Samples in Sound Bridge
Use Sound Bridge software to organize sample files for upload to the QSR Flash RAM card.
Before you begin
Refer to the Creating the Sound Bridge Project topic for general procedures related to Sound Bridge Project files.
About this task
- Group sample files by sample type (e.g., group samples for kicks, snares, toms, cymbals, and percussion).
- Load related files in sequence (left and right channels from stereo samples, samples intended for velocity crossfading).
- Decide what order will be used for loading samples in the Project. Once you use the samples on your card in custom QSR Programs, those Programs will expect to find them in the same location on the card, so you cannot easily move the samples later.
- Create a list or use a spreadsheet to make your plan. A spreadsheet helps you calculate the required storage for your samples.
- Note the file type (mono or stereo), and specify which stereo files will be mixed to mono and which will be split into separate left and right channel files.
Planning helps fit the maximum number of sample files on the PCMCIA Flash RAM card. Cards used with the QSR have limited space (8 Megabytes). I recommend use of the largest cards because sample files consume a lot of memory space. Regardless of card size, you will eventually run out of space if you add a lot of large sample files or use too many stereo samples.
Sound Bridge provides options when converting files for upload to the QSR. Mono files, of course, are uploaded without changes. With stereo sample files, you can split the left and right channels and save them as separate files, or the channels can be blended during conversion to create a single, mono file.
The steps for adding different mono and stereo sample files to a Sound Bridge Project are demonstrated below.
Links to topic sections:
Procedure
Adding Mono Sample Files
-
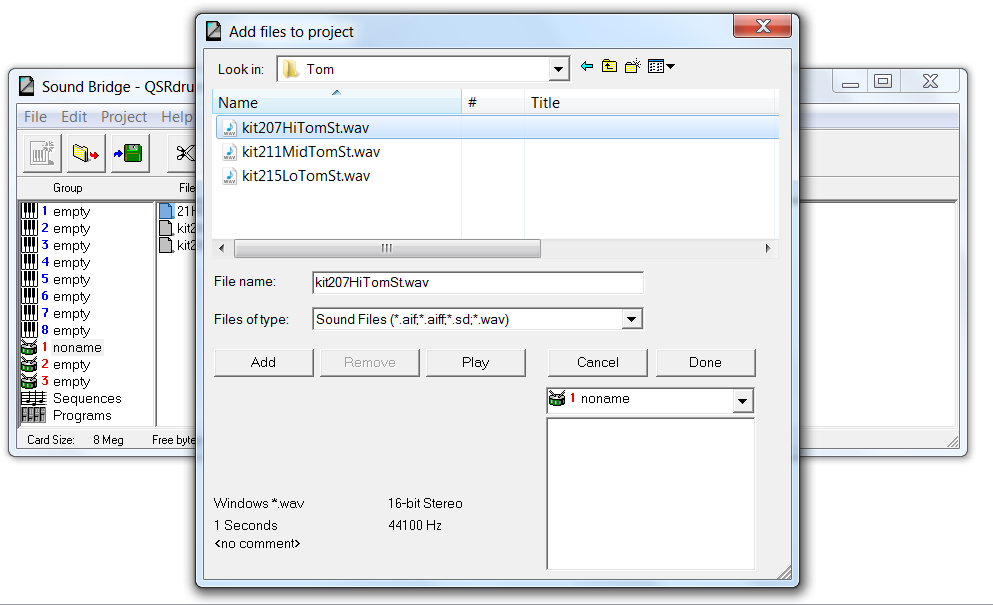
Click to open the Add files to project
window.
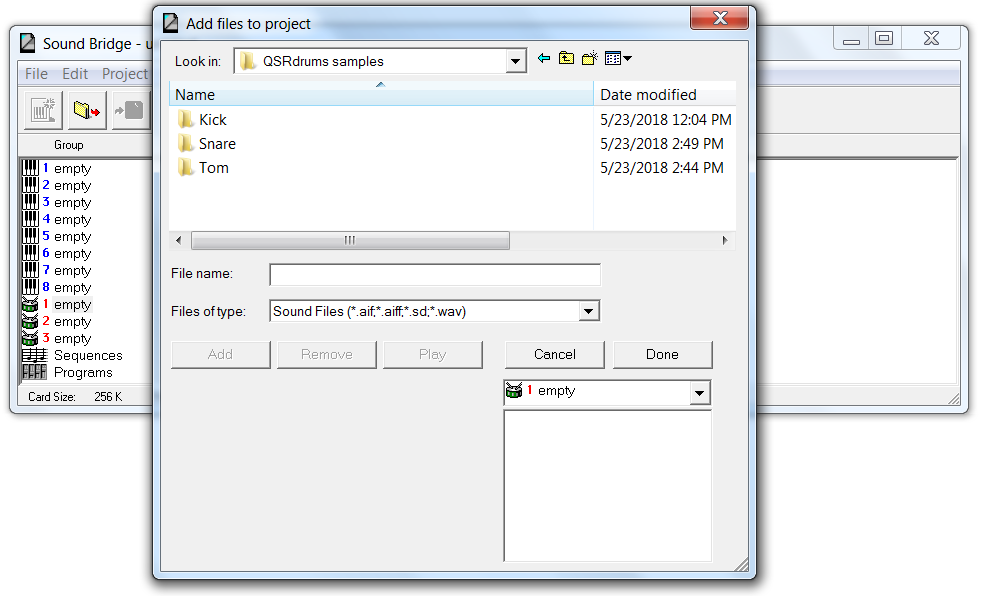
-
Locate and select the mono file you want to add to the Project.
Tip: DAW software or mastering software like Wavelab Elements allows you to view or change the audio properties and formats of sample files. You can also view the audio properties in Sound Bridge by clicking on a file name in the Add files to project window.In the Processing Sample Files topic I demonstrated the use of Wavelab Elements to convert a stereo kick drum sample to a mono file. We will use that file in this example.
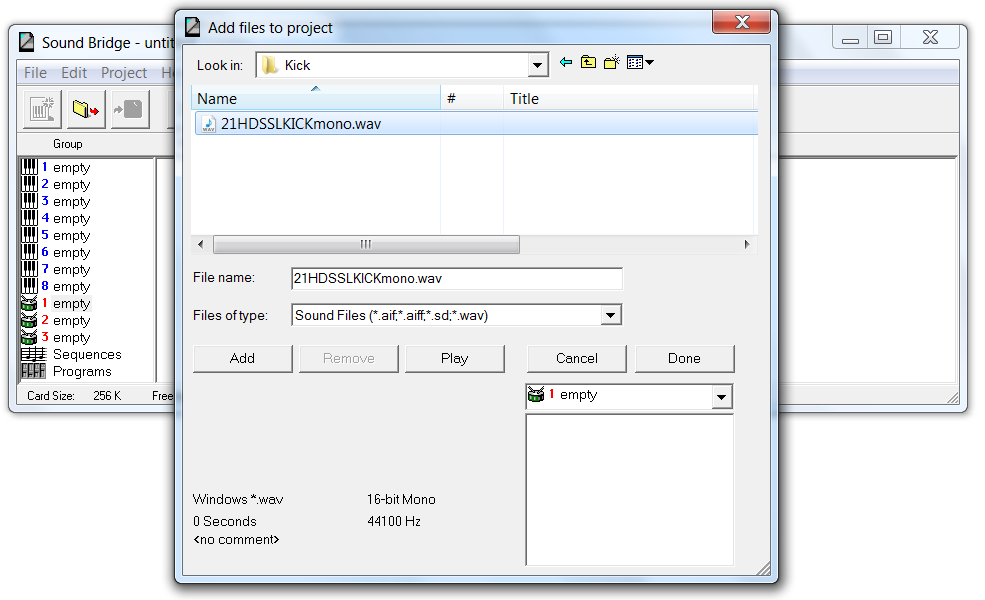 Note: The audio properties for the highlighted file are displayed in the lower-left corner.
 -
Click Done to save the change and close the
window.
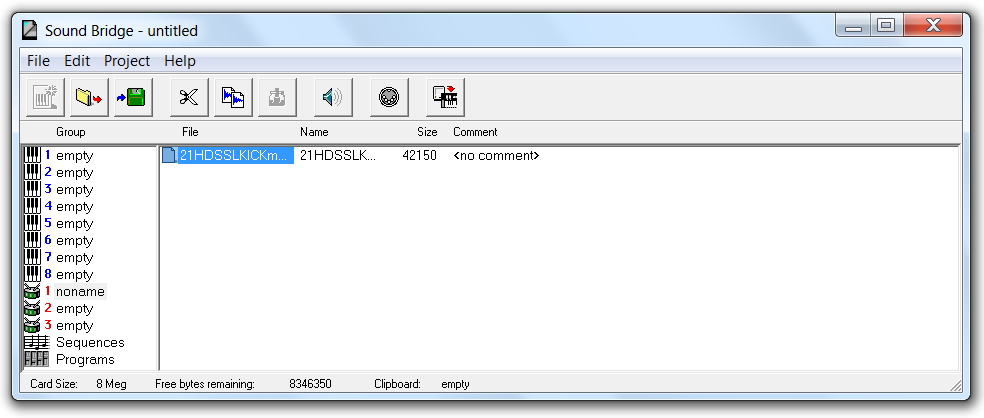
Note: The "Free bytes remaining" value at the bottom of the screen reflects the card size minus the storage space used by the file we added. As you exhaust the card storage capacity, this information will help you avoid exceeding the limit.
Settings for Stereo Sample Files
To add stereo samples to a Sound Bridge Project, you use a similar procedure to that used for mono samples. The primary difference between the procedures relates to the way the QSR handles stereo samples.
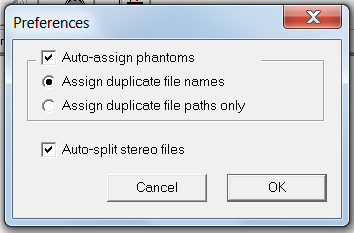
If the Auto-split stereo files box is checked, Sound Bridge will separate the left and right channels, creating separate mono files. Sound Bridge will assign a Voice Name to the mono files it creates, appending "L" and "R" to the left and right channel names. If the box is not checked, Sound Bridge will create a mono file by mixing the stereo channels.
In this topic, I discuss procedures for splitting stereo samples and for mixing a stereo sample to a mono file.
Splitting Stereo Samples
-
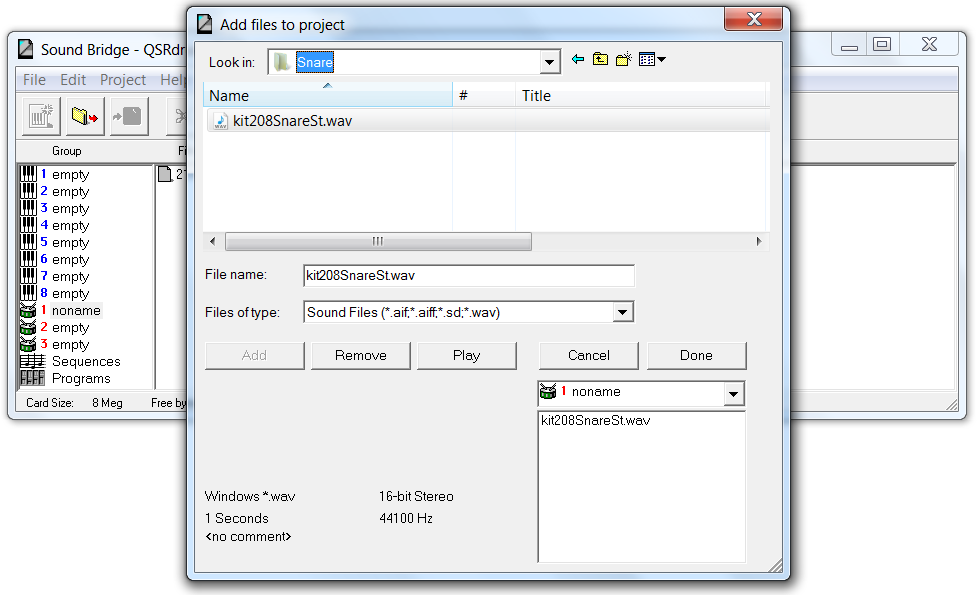
Click to highlight the file in the Add files to project
window.
In this example, I use a stereo snare drum sample file named kit208SnareSt.wav. As shown in the image below, this is a 16-bit, stereo file.
-
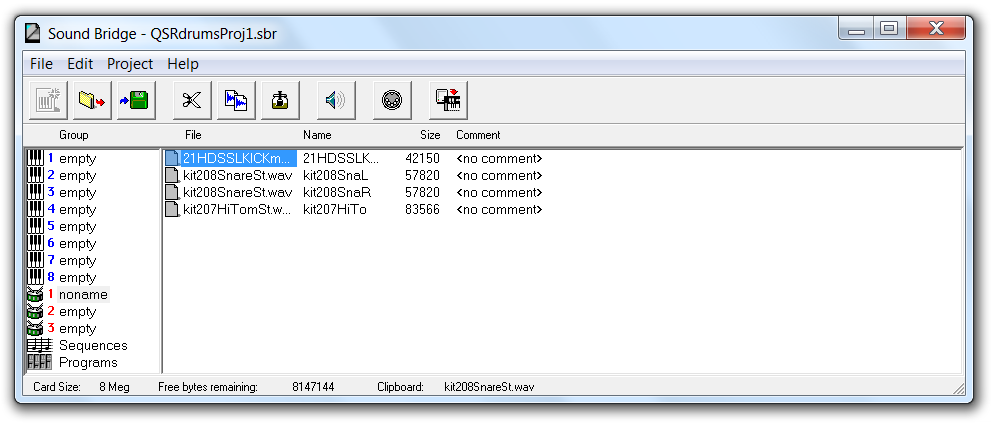
Review the contents of the sample group in the Project
window.
Sound Bridge added the stereo sample to the Project by splitting the sample into two mono files. The Voice Names for the added files are shown below, with "L" and "R" appended. The Voice Name is a truncated version of the sample file name due to character limitations.
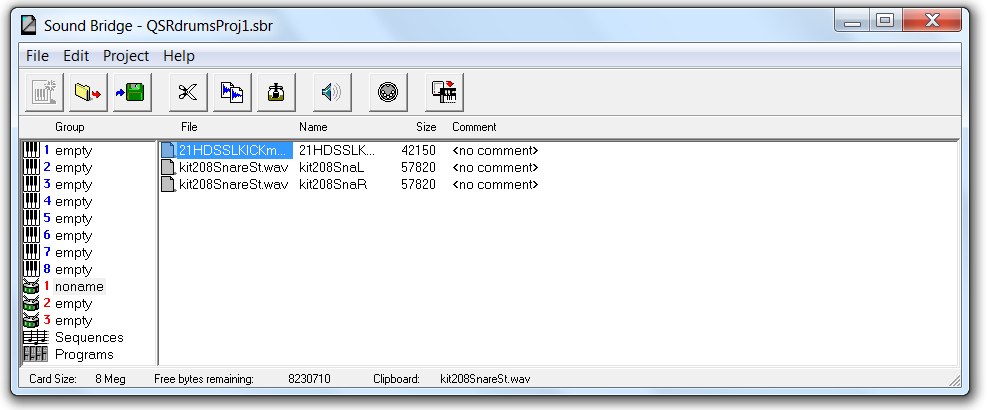 Important: Because the stereo sample was split, the size of each mono file (57kB) is half the size of the original sample (113kB). As we will see below, adding stereo samples with the Auto-split stereo files box unchecked will cause Sound Bridge to add a single mono file that is half the size of the source file. This becomes important when managing sample file sizes to fit in the limited space of the Flash RAM card.
 -
To view information about Voices added to the Project, highligh a file name in
the Project window, then click to open the Voice Info window below.
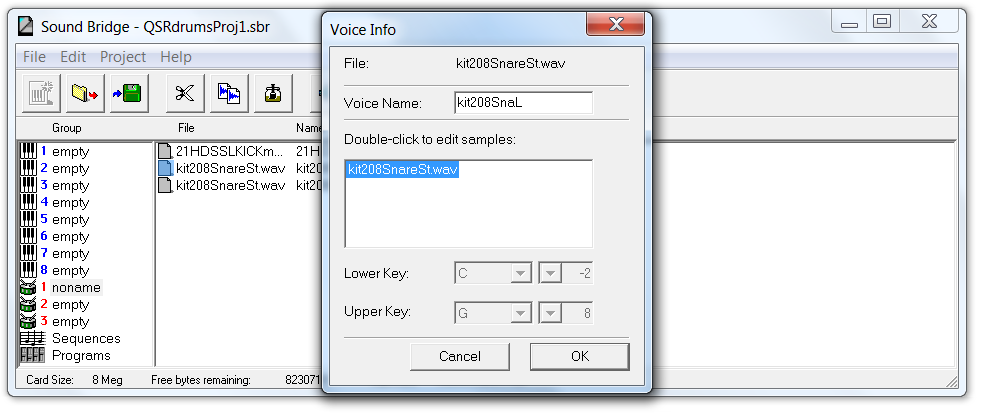
The Voice Info window contains information that does not apply to drum samples. But double-clicking on the sample name in the lower pane opens the Sample Info window below, which shows the settings related to stereo sample processing.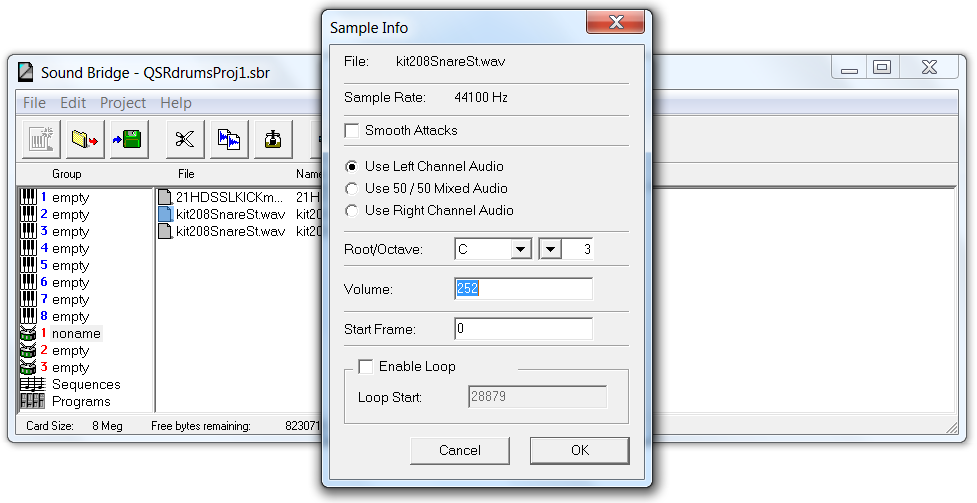 CAUTION:Although you can change the settings for the Voice by checking a different box in the Sample Info window, I do not recommend this. This method will force Sound Bridge to change from a split file to a mono mix but the Voice Name in the Project will not change. This will cause confusion. Instead, delete the files from the Project and then add the sample again with the correct Preferences set, if you need to convert the file differently.
Converting Stereo Samples to a Mono File
-
Click .
In this example I use a stereo tom sample named kit207HiTomSt.wav. Sound Bridge will convert this to a mono Voice file based on the current Preferences settings.
-
Click Add, then click Done. The
file will be added to the Project window as shown
below.
A single, mono file was added to the Project. Note that the file size (82kB) is half the original sample size (164kB). Opening the Sample Info window shows the settings related to conversion of the stereo sample.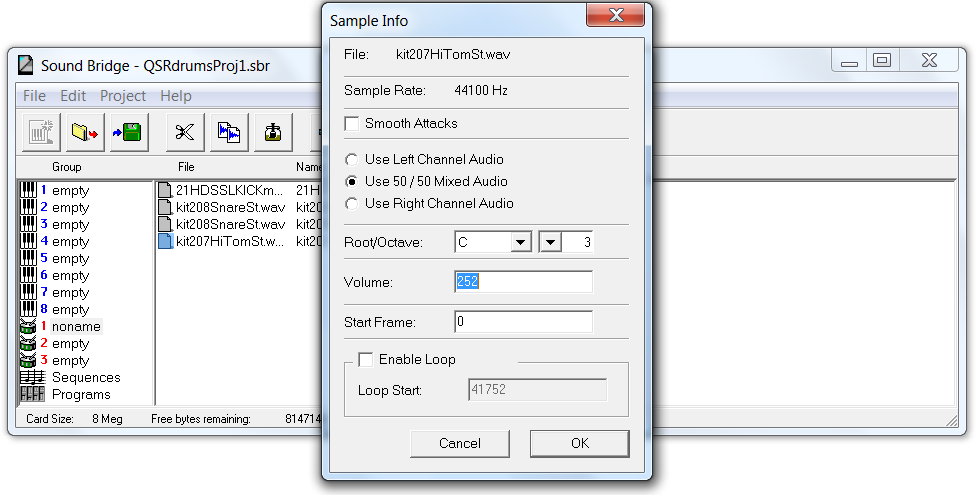
Exporting the Excel Project File
-
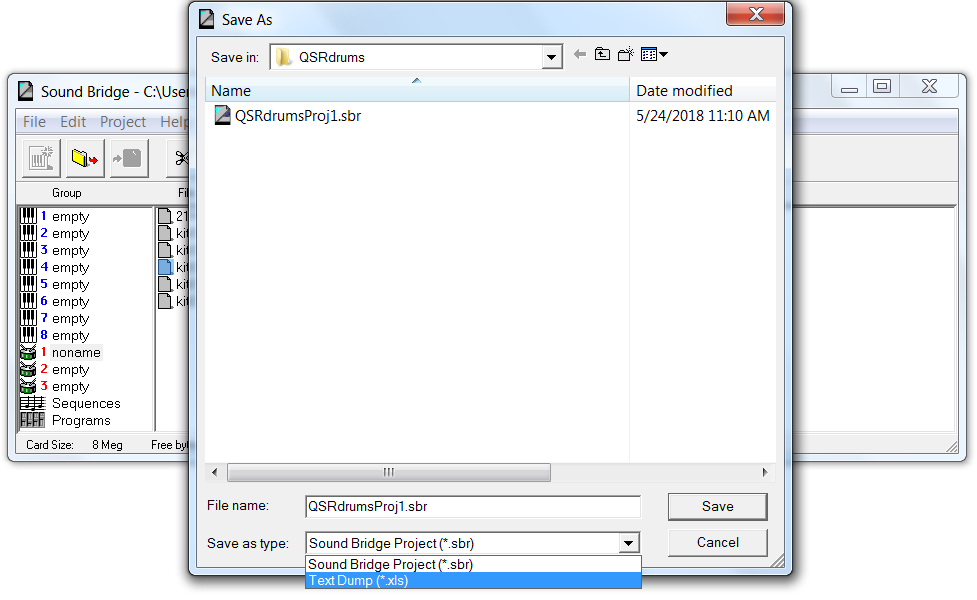
Use the Save as type: dropdown menu to select
Text Dump (.xls).
-
Open the .xls file to view important Project details as shown below.
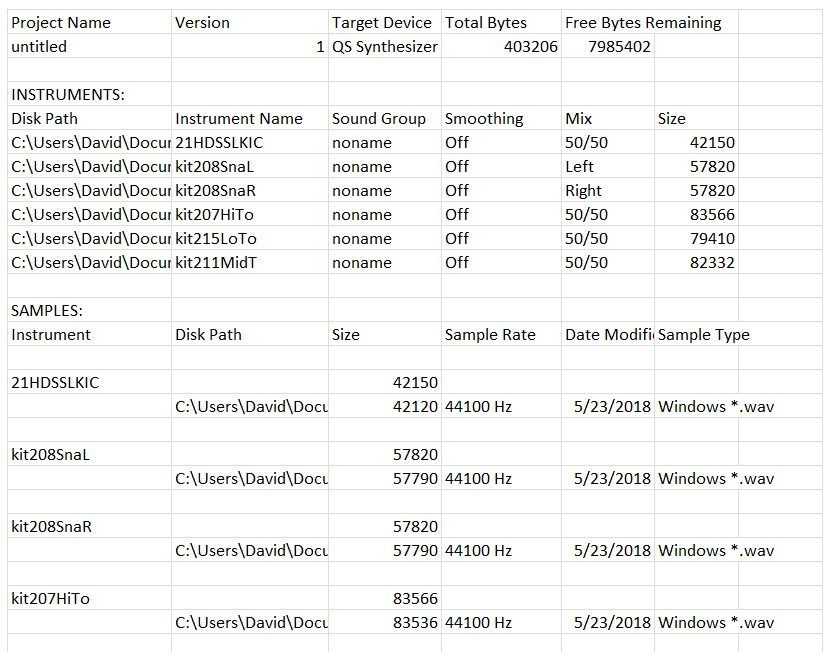
Tip: Use the Excel file to manage your Sound Bridge Projects. Add columns for notes about individual samples, including names of Programs that use the samples.