Creating the Mix Template
Create a Mix Template to save time and ensure consistency when programming the QSR Drum Synthesizer.
Before you begin
- Review the general concepts presented in this Manual.
- Determine your system configuration, download the software, and assemble your hardware.
- Verify communication between the QSR and QS Edit Pro.
- Familiarize yourself with Programs and Mixes using the Working with Programs and Working with Mixes topics.
- Refer to the Loading the QS Drum Bank Sysex File topic for instructions on loading the Programs into the User bank.
About this task
In this topic, you will learn basic Mix editing techniques while creating your Mix Template. The template will simplify creation of Mixes that conform to the Programming Strategy topic guidelines. You will use the editing techniques presented here in later topics.
Links to topic sections
Procedure
Initializing the Mix
-
Verify that QS Edit Pro displays the Mix Mode window
below.
-
Click
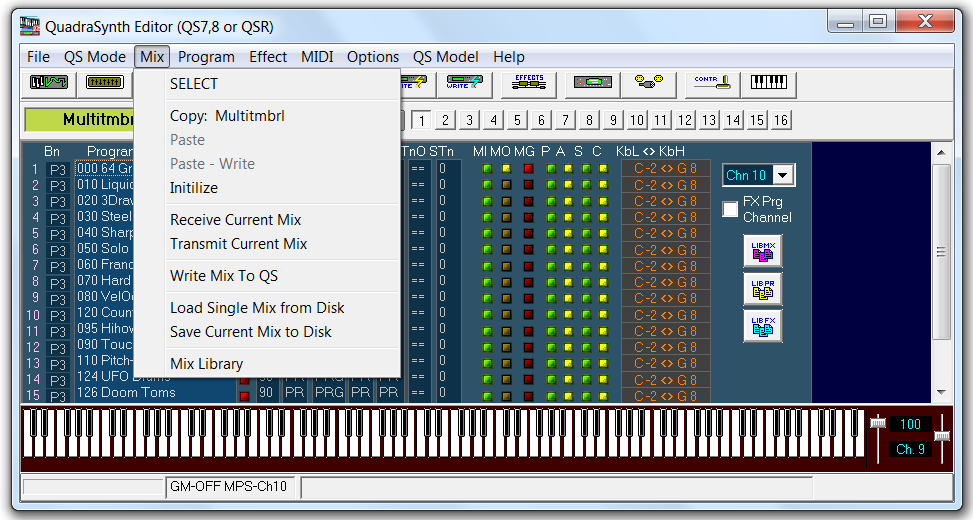
Note: Initializing the Mix location overwrites the Mix settings. -
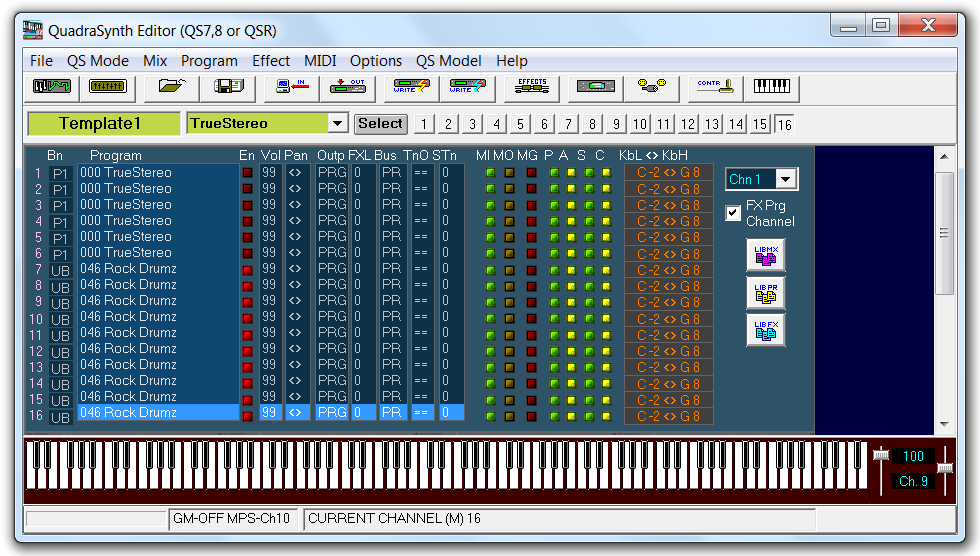
Review the initialized Mix Mode display.
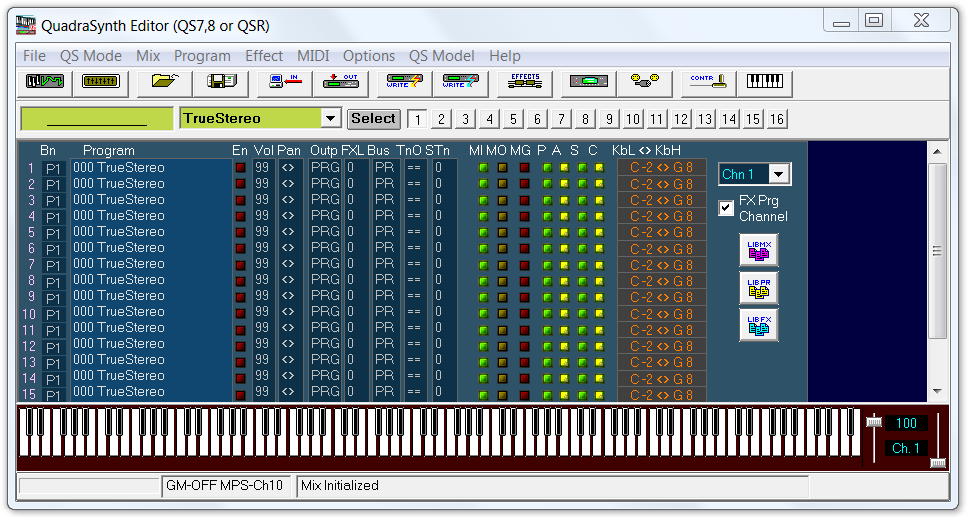
The Mix Mode window shows the 16 Mix channels, each of which responds to a different MIDI channel. Note that all 16 Mix channels are now set to the "TrueStereo" Program, the Mix name has been cleared, and all parameters have been reset.We will now create a drum Mix Template using the QS Drum Bank Programs loaded into the User bank, following the guidelines presented in the Programming Strategy topic.
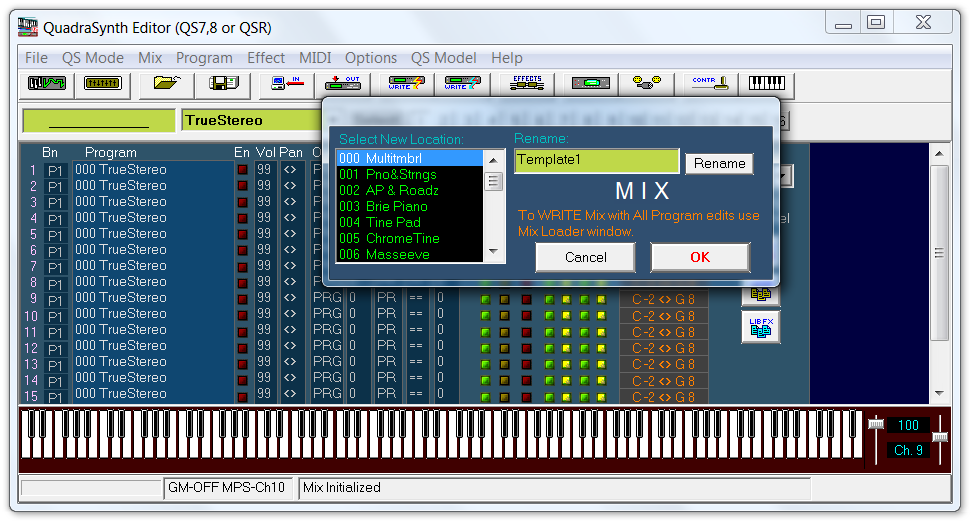
Renaming Mixes
-
Use the Rename box in the Write
Mix window to enter the Mix name. Type
Template1. Click OK to confirm
the name change.
Selecting Programs for the Mix
-
Double-click the "TrueStereo" Program name in Mix channel 7 to open the
Select Program window.
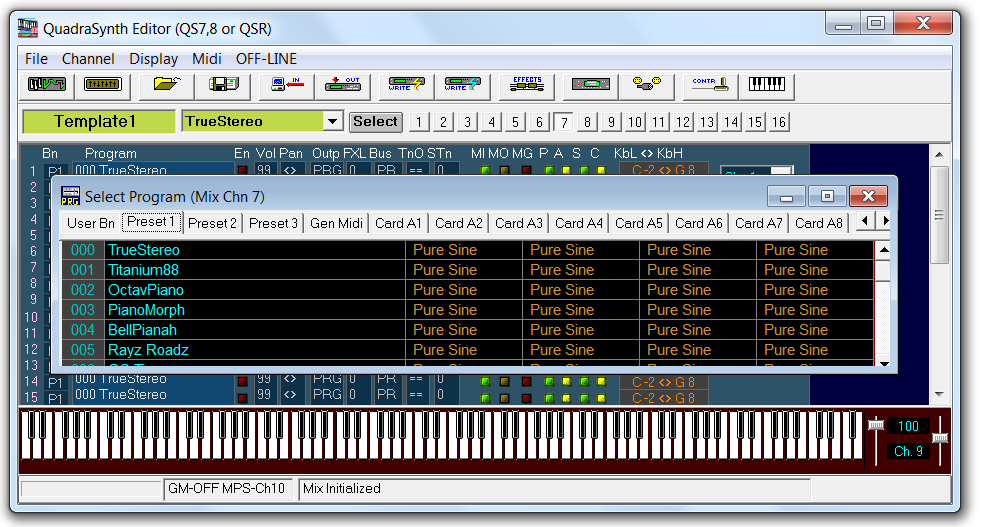
Note: When editing Mixes, use the Select Program window to select Programs for the individual Mix channels. -
Click the User Bn tab to view the QS Drum Programs in
the User bank. Stretch the Select Program window for
easier viewing.
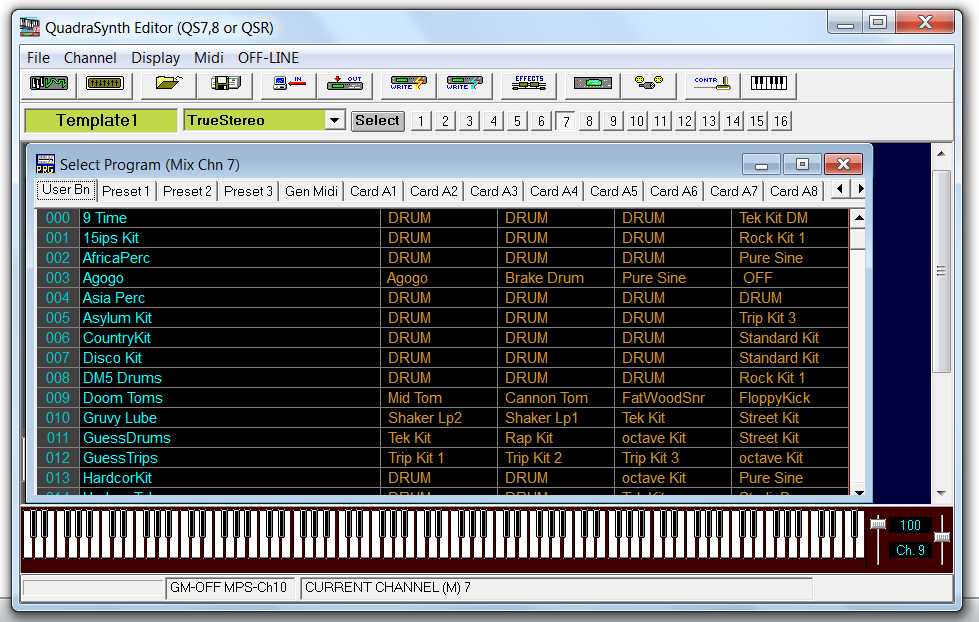
-
Find Program 046 labeled "Rock Drumz". Click the Program name to select the
Program, then close the Select Program window. The new
Program name will appear in Mix channel 7.

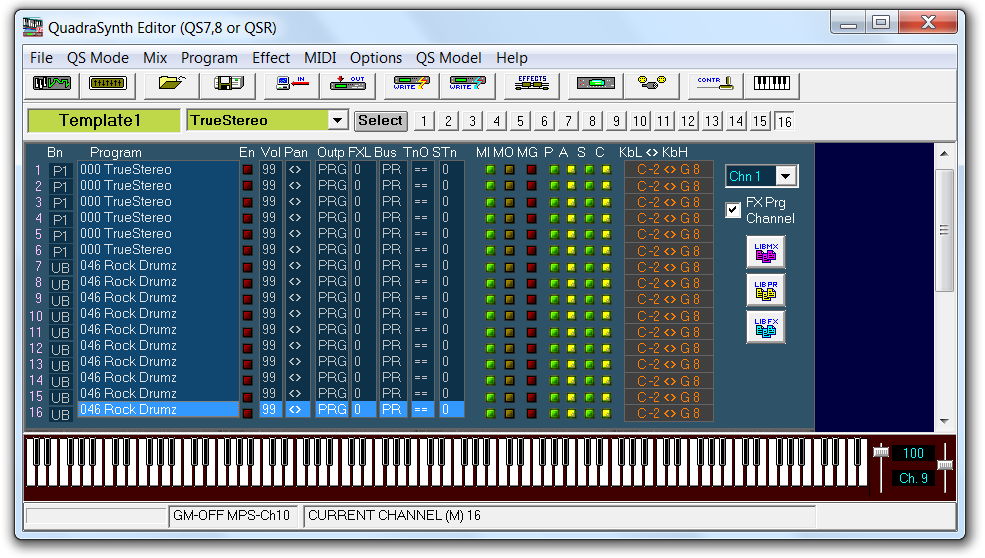
-
Repeat the steps in this section for Mix channels 8 through 16. The Mix mode
screen should now show the "Rock Drumz" Program in these channels.
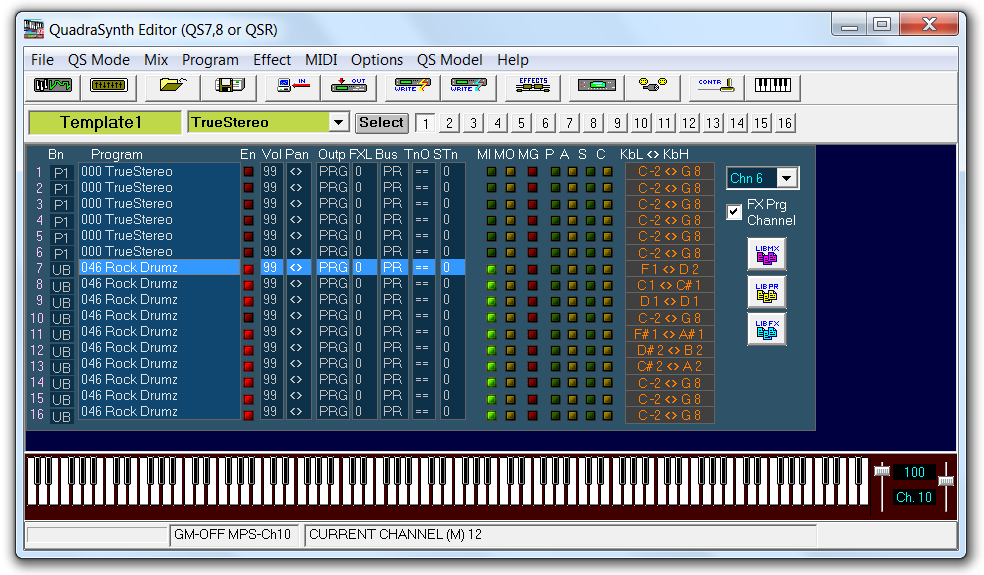
STORE the changes from the QSR front panel. The
Mix Mode window should match the figure below.
Set Mix Channel Note Ranges
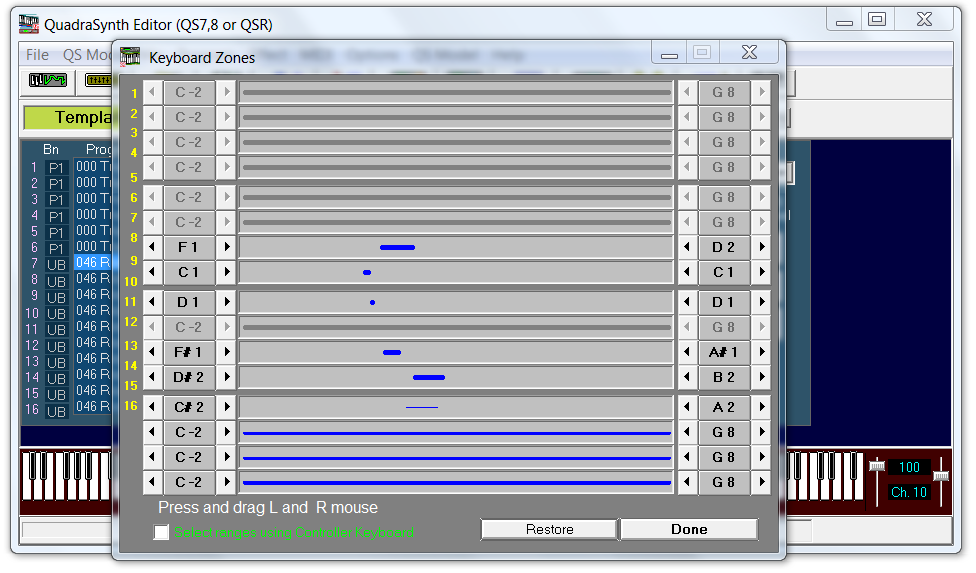
The table below shows the standard Keyboard Zone note ranges defined in the guidelines for my Programming Strategy.
Figure: Mix Channel Note Range Settings
| Mix Channel | Drum Group | Note Range |
|---|---|---|
| 7 | toms | F1–D2 |
| 8 | kick | C1–C1 |
| 9 | snare | D1–D1 |
| 10 | Mix Group channel | C-2–G8 |
| 11 | hi hat | F#1–A#1 |
| 12 | ride cymbals | D#2–B2 |
| 13 | crash cymbals | C#2–A2 |
| 14 | User Defined | User Defined |
| 15 | User Defined | User Defined |
| 16 | percussion | C-2–G8 |
The Programming Strategy uses MIDI channels 7–16 for drum groups. Channel 10 is reserved for the Mix Group control channel. Channel 16 is used for percussion instruments. Channels 14 and 15 can be assigned by the user for other sounds or effects as required. Channel 6 will be used as the Mix Effects Program channel and does not require a note range setting.
The note ranges are based on the General MIDI standard for drum and percussion instruments. In the GM standard, some ranges overlap. For example, toms, cymbals, and certain percussion instruments overlap. The overlap will not create problems as long as drum groups are controlled using separate MIDI channels. However, if overlapping drum groups are assigned to the Mix Group, then unexpected results will occur.
To prevent this, only one of the overlapping drum groups should be assigned to the Mix Group in a Mix. An alternate approach involves remapping note numbers, ignoring the General MIDI note number standards, to eliminate overlaps. Cymbals, for example, could be moved below the standard drum note range to eliminate the overlap with tom notes.
-
Click the Channel Enable (En) control on Mix channels
7–16. The button will turn bright red as shown below.
-
Click the cell in the KbL<>KbH column for any of the
enabled channels to open the Keyboard Zones window.
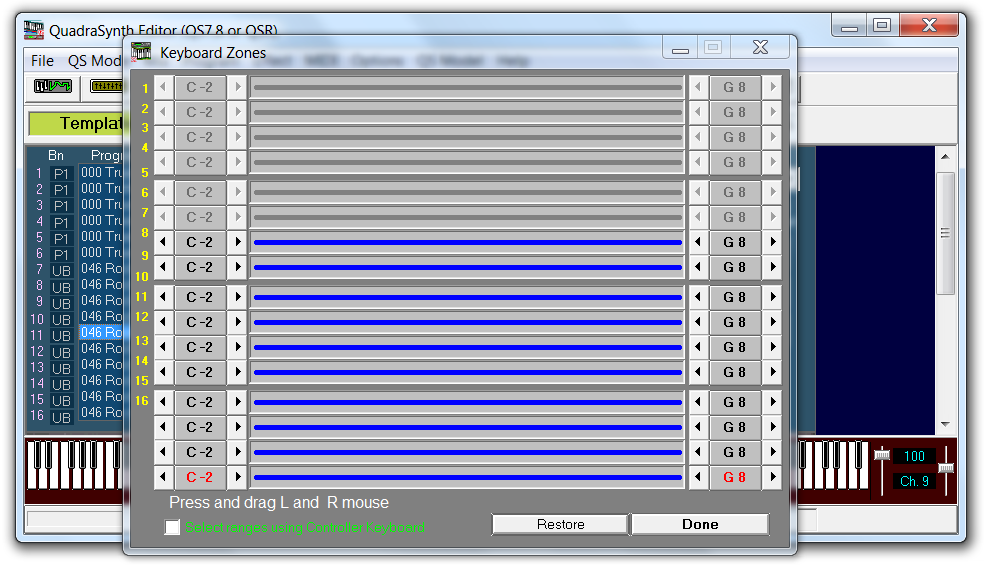
Attention: The channel number labels on the left side are not properly aligned with the note range controls. The window shows all 16 channels but the channel 16 label is next to channel 13. Do not be confused by this.Note: You cannot adjust the Keyboard Zone note ranges for disabled channels in the Mix Mode window. -
Use the arrow buttons to adjust the upper and lower ends of the note range for
each enabled Mix channel as shown below.
Complete the Drum Mix Template
-
Change the Effects Program Channel setting to Channel 6
and check the FX Prg Channel box.

-
Disable all controls for Pitch-bend,
Aftertouch, Sustain Pedal, and
Controllers by clicking the buttons in the respective
columns. These controls relate to keyboard applications.
The Mix Mode window should match the screen shot below.